
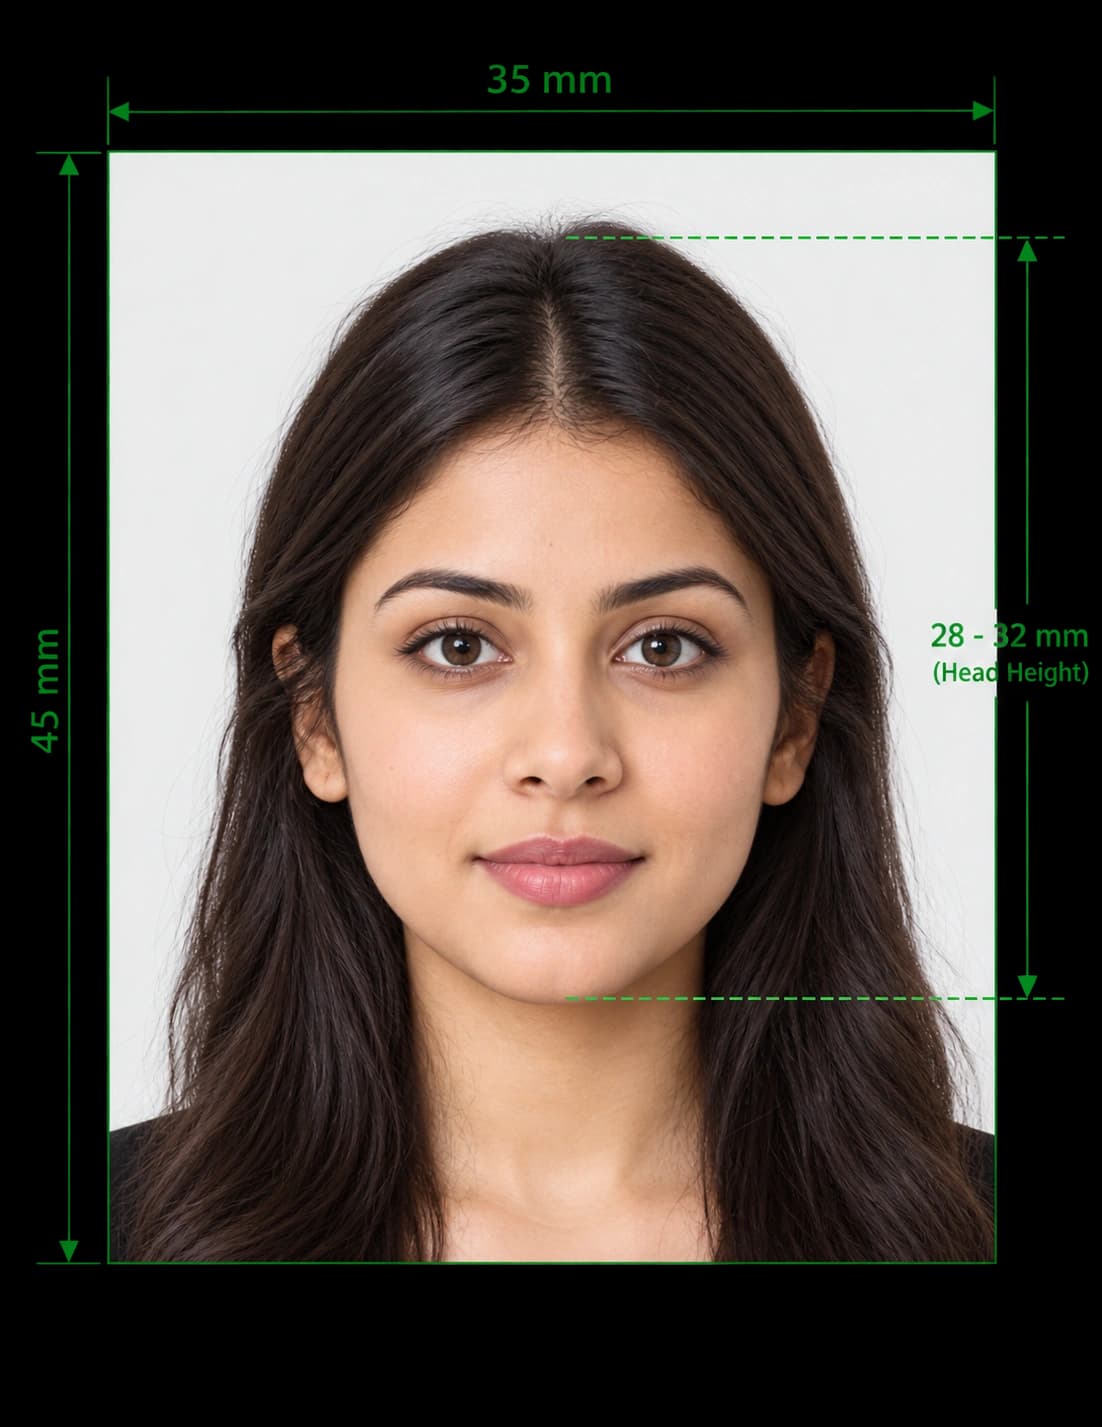
Take a Passport Photo on iPhone: The Quick Answer
You can take a passport photo on iPhone in about 10 minutes. Your camera is sharp enough, and our tool handles the sizing. Stand in front of a plain wall, take a straight-on photo with the rear camera, and upload it. We crop it, replace the background and check your head size against the official range.
This guide shows you how to take a passport photo with an iPhone, which settings to change and how to avoid the mistakes that cause rejections.
- Time needed: about 10 minutes
- What you need: an iPhone, a plain wall and a helper (or a timer)
- Result: a correctly sized digital file and a print-ready sheet
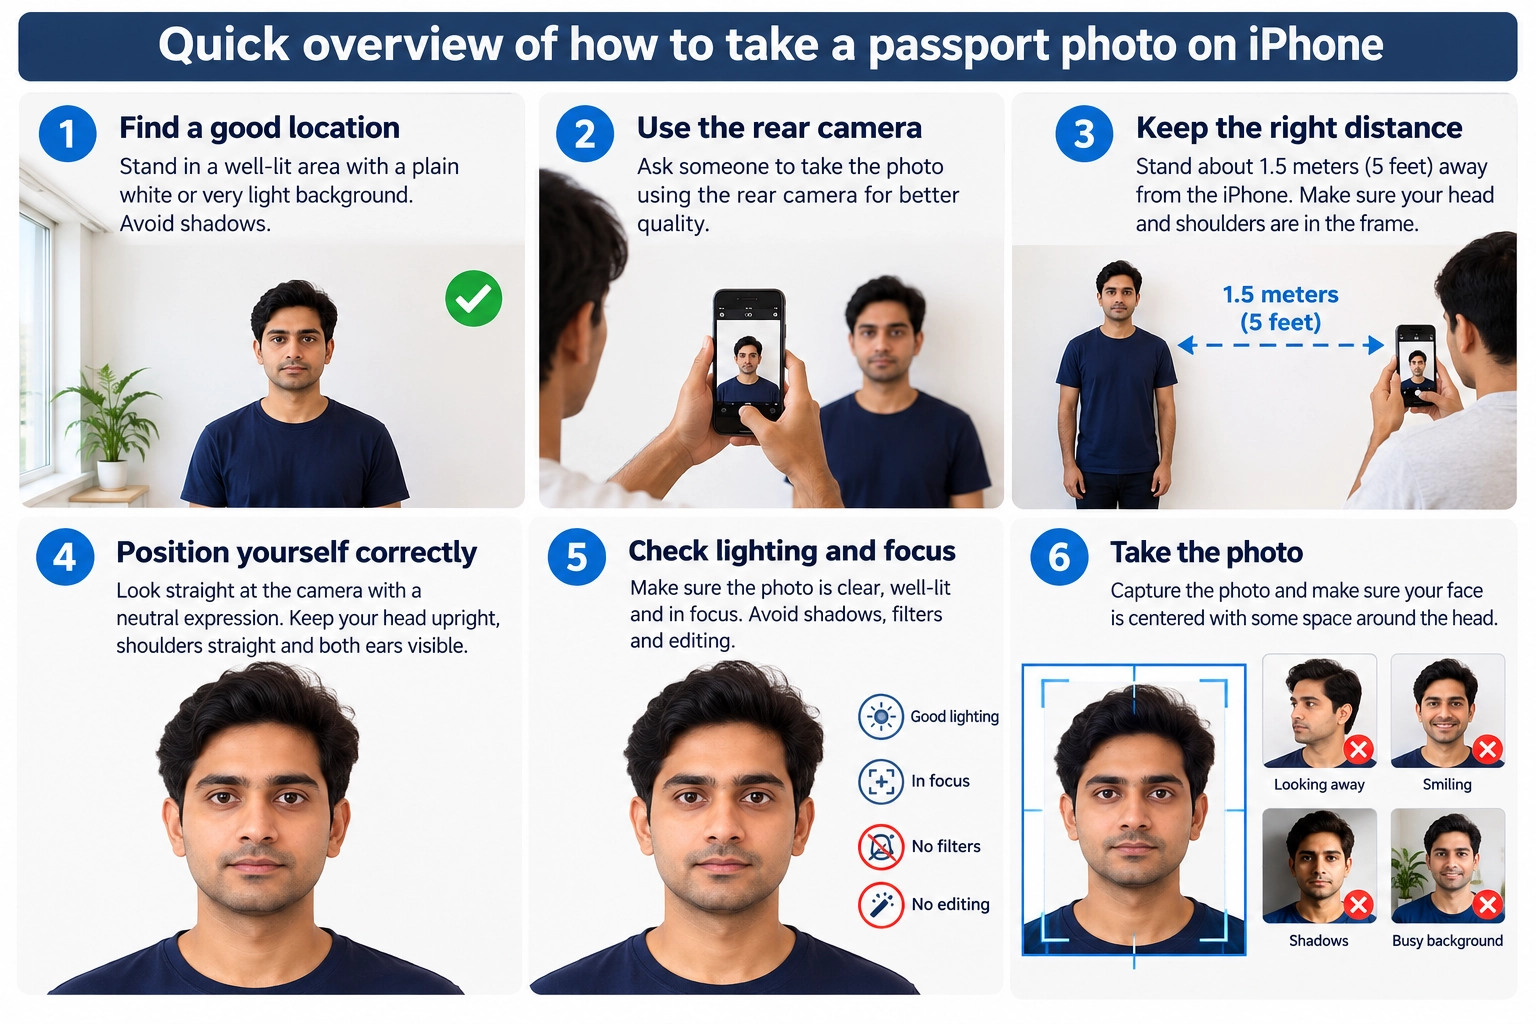
What You Need to Take a Passport Photo With iPhone
You already own most of the equipment.
- An iPhone: Any model from the last several years takes a sharp enough photo.
- A plain wall: A light wall with no pattern works best.
- A helper: Someone else can hold the phone at eye level.
- Soft daylight: A large window gives even light on your face.
How to Take Passport Photo With iPhone in 6 Steps
Follow these six steps in order. Each one removes a common cause of rejection.
Step 1: Set Up Your Space
Good light and a clean background make the biggest difference.
- Face a window. Let daylight fall evenly on your face, with no shadows.
- Avoid direct sun. Harsh light creates shadows and makes you squint.
- Stand in front of a plain wall. Keep frames, doors and furniture out of the shot.
- Stand about one metre from the wall. This reduces shadows behind your head.
- Wear a plain top. Choose a colour that contrasts with the wall.
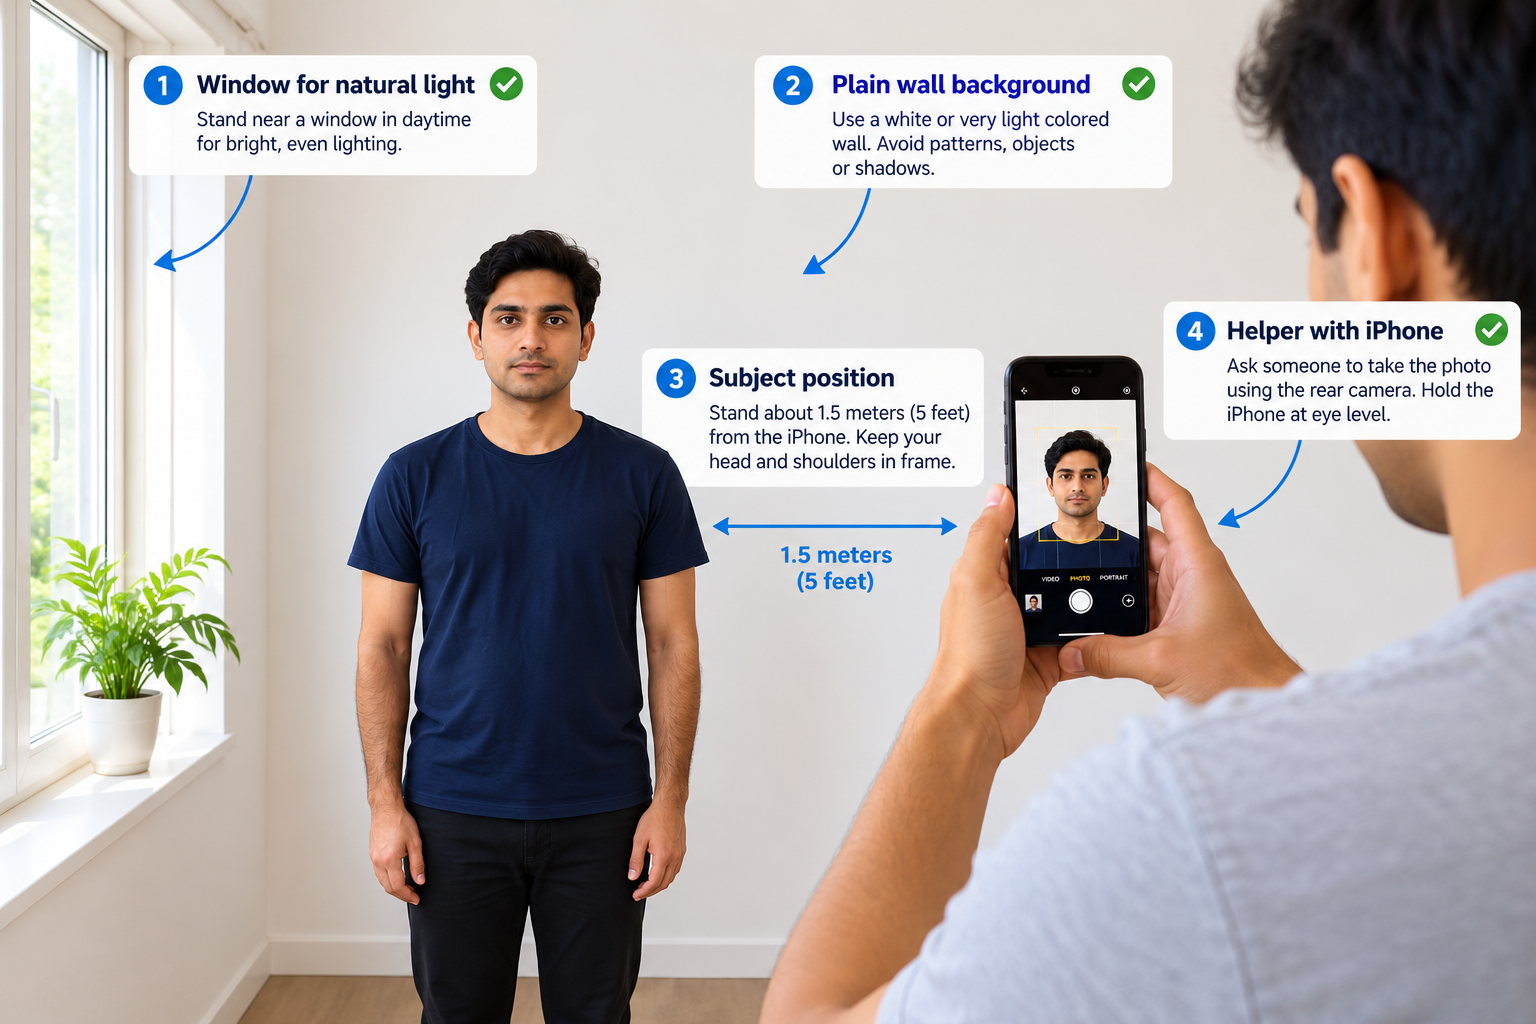
Step 2: Adjust Your iPhone Camera Settings
A few quick changes give you a cleaner, more usable picture.
| Setting | What to do |
|---|---|
| Camera | Use the rear camera, not the selfie camera |
| Mode | Choose Photo, not Portrait, to avoid artificial background blur |
| Flash | Turn it off |
| Live Photo | Turn it off |
| Filters | Set to Original and avoid beauty effects |
| Grid | Turn on Grid in Settings > Camera to help you centre your head |
| Format | Choose Most Compatible in Settings > Camera > Formats to save JPEG files |
The Most Compatible setting matters because iPhones save HEIC files by default. Some official portals only accept JPEG.
Step 3: Position Your iPhone
Camera height and distance control how natural your face looks.
- Hold the phone at eye level. A camera that points up or down distorts your face.
- Stand about one to 1.5 metres away. A closer camera stretches your nose and forehead.
- Keep the phone upright. Shoot in portrait orientation.
- Leave space around your head. The tool needs room to crop correctly.
If your iPhone has a 2x option, use it. It reduces distortion compared with shooting close on the 1x lens.
Step 4: Pose and Take the Photo
Now take the shot.
- Face the camera. Look straight at the lens with your head level and your shoulders square.
- Keep a neutral expression. Close your mouth and keep both eyes open.
- Show your full face. Move hair away from your eyes and eyebrows.
- Remove your glasses. Many countries no longer accept them, except for documented medical reasons.
- Use the timer. Open the Camera app, tap the timer icon and choose 3 or 10 seconds.
- Take several shots. Choose the sharpest, most natural picture.
Ask your helper to press a volume button as the shutter. This avoids camera shake.
Step 5: Check Your Photo
Open the picture in the Photos app and zoom in.
- Is your face sharp, with clear eyes?
- Is the light even, with no shadow on your face or the wall?
- Is your head straight, centred and fully in the frame?
Retake the photo if you answer no to any question. A retake takes one minute.
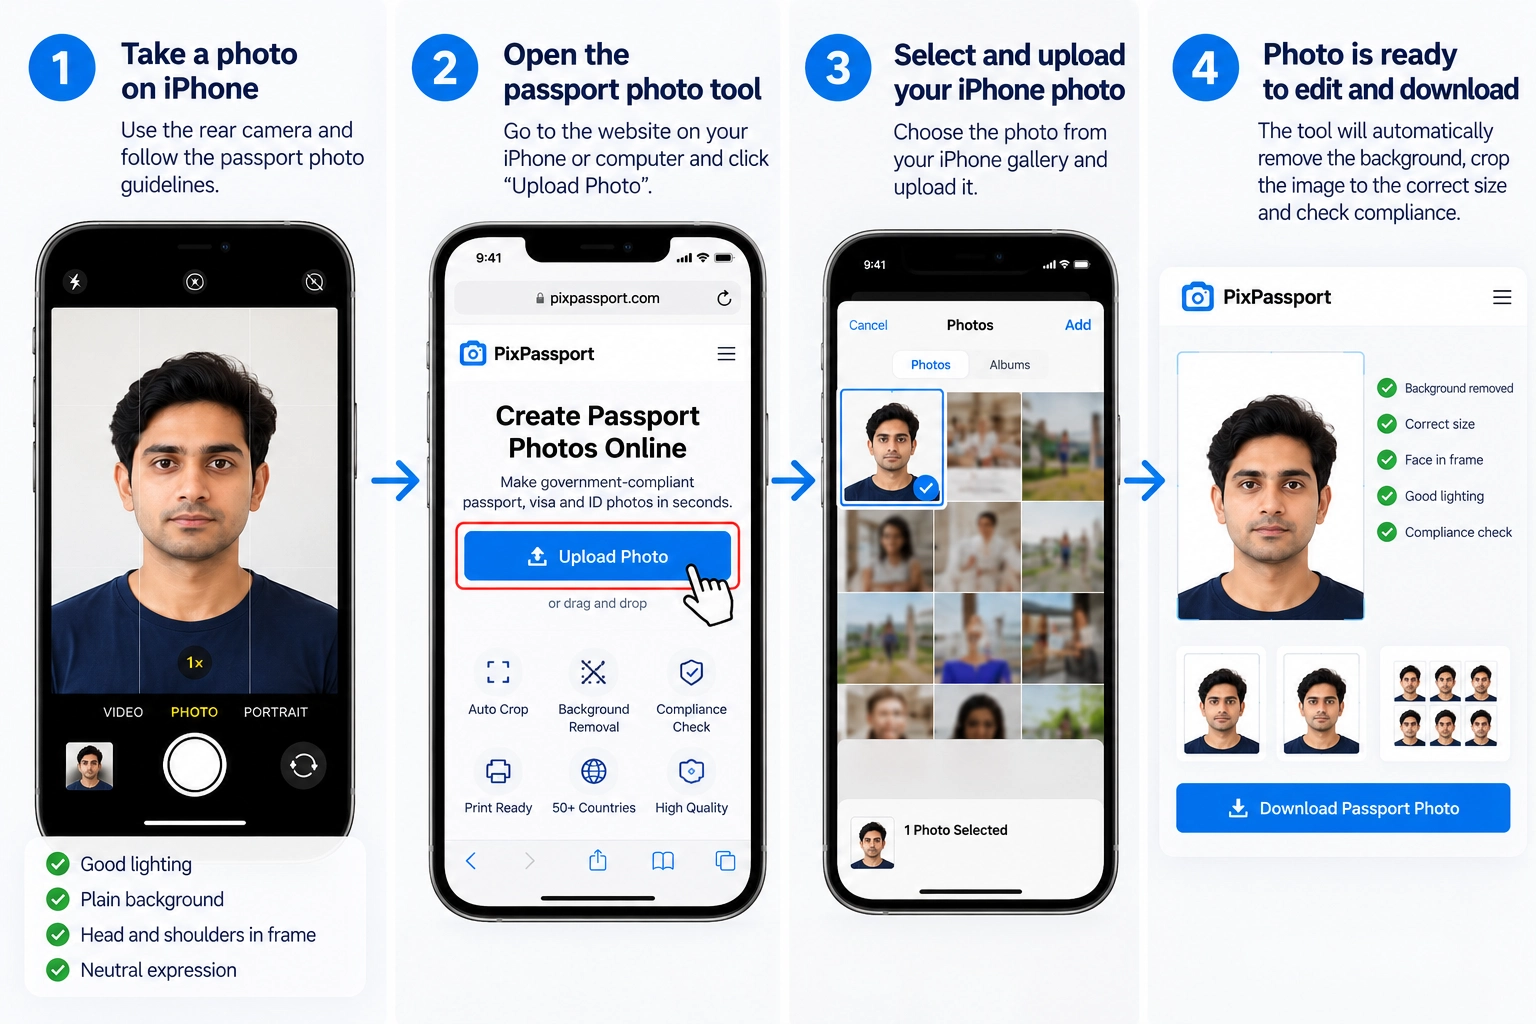
Step 6: Upload It to Our Tool
Open the tool in Safari, choose your country and document, and upload your photo. The tool then:
- crops the image to the exact passport size,
- replaces your wall with the required background,
- checks your head size and position, and
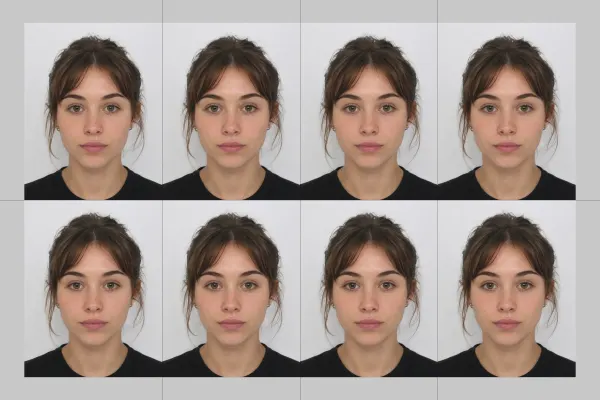
- creates a digital file and a print-ready sheet.
How to Take a 2x2 Passport Photo on iPhone
Need the US format? A 2x2 photo is a square that measures 2 × 2 inches (51 × 51 mm). You can take the photo the same way, then square it up in your iPhone.
- Open the photo in the Photos app and tap Edit.
- Tap the Crop icon.
- Choose Square in the aspect ratio options.
- Keep your head in the middle, with space above it.
- Upload the result to our tool and select the US passport or visa option.
Our tool then sets the head height, background and file size. US digital uploads must be square, between 600×600 and 1200×1200 pixels, and no larger than 240 KB.
How to Take an ID Photo With iPhone
You can use the same method for visas, national ID cards, driving licences and residence permits. The setup stays the same: plain wall, even light, neutral face and camera at eye level.
Requirements change with the document, so select the exact one in the tool. It applies the right size and background.
Passport Photo Sizes by Country
Sizes differ, so choose the right format before you print. Here are common ones:
| Country or region | Photo size | Notes |
|---|---|---|
| United Kingdom | 35 × 45 mm | Cream or light grey background |
| United States | 2 × 2 in (51 × 51 mm) | Square, white or off-white background |
| European Union (Schengen) | 35 × 45 mm | Plain, light background |
| India | 35 × 45 mm (630 × 810 px online) | Some missions abroad set their own rules |
| Canada | 50 × 70 mm | Larger portrait format |
| Australia | 35 × 45 mm | Plain, light background |
Always confirm current rules with your country's passport authority before you apply. Need a specific format? See our pages for the UK passport photo, Indian passport photo and US visa and passport photo.
Passport Photo App for iPhone vs Online Tool
You do not need to install an app. Our tool runs in Safari, so you can go from photo to finished file without leaving your browser.
Some apps charge subscriptions. With our tool, you preview your result for free and pay only if you download the final file.
How to Print Your iPhone Passport Photo
Paper applications need printed photos. You have two easy options.
- Print at a shop or kiosk. Save the 6 × 4 inch (10 × 15 cm) print sheet to your iPhone, take it to a pharmacy or photo kiosk, and ask for a 6 × 4 inch print with no cropping.
- Print at home with AirPrint. Open the sheet, tap Share, tap Print and choose your printer. Load glossy or matt photo paper and select the highest quality.
Then measure one photo with a ruler to confirm the exact size. Cut along the guides with a trimmer or sharp scissors. Some applications also ask for a countersignature on the back of one photo, so read your form.
Common Mistakes When You Take a Passport Photo on iPhone
| Mistake ❌ | Fix ✅ |
|---|---|
| Selfie distortion | Use the rear camera and ask a helper |
| Portrait mode blur | Switch to standard Photo mode |
| Shadows behind your head | Stand about one metre from the wall |
| Phone held too high or low | Hold it at eye level |
| Filters or beauty effects | Use the Original filter |
| HEIC file rejected | Choose Most Compatible in camera settings |
| Wrong size after printing | Print at 100% scale and measure the result |
| Smiling or squinting | Relax your face and take several shots |
Start Your iPhone Passport Photo Now
Take a photo, upload it and get a correctly sized passport photo in minutes. Print it yourself or download the file, with no studio visit needed.
Frequently Asked Questions
Everything you need to know about official How to Take a Passport Photo With an iPhone requirements and specifications.
Can you take a passport photo on iPhone?
Yes. An iPhone camera is sharp enough for a passport photo. Take a clear, front-facing picture against a plain wall, then use a tool to size it and check the background. Follow your country's rules.
How do I take a passport photo with my iPhone by myself?
Set your iPhone on a stand or a stack of books at eye level, about one metre away. Open the Camera app, turn on the timer, step into position and take several shots. A helper gives you better results, but the timer works.
What iPhone settings should I use for passport photos?
Turn off flash, Live Photo and filters. Turn on the grid to centre your head. Choose Most Compatible in Settings > Camera > Formats so your iPhone saves JPEG files instead of HEIC.
Can I make a 2x2 photo on iPhone?
Yes. Open the photo in the Photos app, tap Edit, tap Crop and choose Square. Then upload it to our tool, which sets the head size, background and file size for US requirements.
Can I print a passport photo from my iPhone?
Yes. Use AirPrint or take the print sheet to a pharmacy or photo kiosk. Print at 100% scale on photo paper and measure one photo to check the size.
Will my iPhone passport photo definitely be accepted?
No one can promise that. The issuing authority makes the final decision, but careful setup and our checks help you avoid the most common mistakes.
Ready to create your verified How to Take a Passport Photo With an iPhone?
Upload your photo in seconds and receive guaranteed HMPO / ICAO compliant digital photos and printable sheets.
Upload Photo & Create Now